NextJs에서 Web3 (MetaMask, ConnectWallet) 연결 구현하기 - with ethers.js / web3Modal
라이브러리
3개의 라이브러리를 다운받는다.
recoil - 지갑의 address와 provider 등을 status 에 저장하기 위해서
ethers.js - Ethereum 블록체인을 JavaScript로 상호작용할 수 있게 해주는 라이브러리이다.
web3modal - WalletConnect, MetaMask 등의 여러 지갑을 dapp에서 한 가지 형식으로 통합하여 사용할 수 있는 라이브러리이다.
recoil
1
npm install recoil
ethers
1
npm i ethers
web3-modal
1
npm install --save web3modal
Web3 정보를 저장할 type 생성
먼저 Type들과 web3 정보를 저장할 atom을 생성해준다.
types/web3.ts
1
2
3
4
5
6
7
8
9
10
11
12
13
interface Web3_Model {
  address: string | null | undefined;
  network: ethers.providers.Network | null | undefined;
}

export const initialWeb3 = atom<Web3_Model>({
  key: "my_web3",

  default: {
    network: null,
    address: null,
  },
});
Web3Cleint Hooks 생성
나 같은 경우엔 여러 컴포넌트에서 편하게 사용할 수 있게 hook으로 만들어서 사용하게 되었다.
web3modal 설정
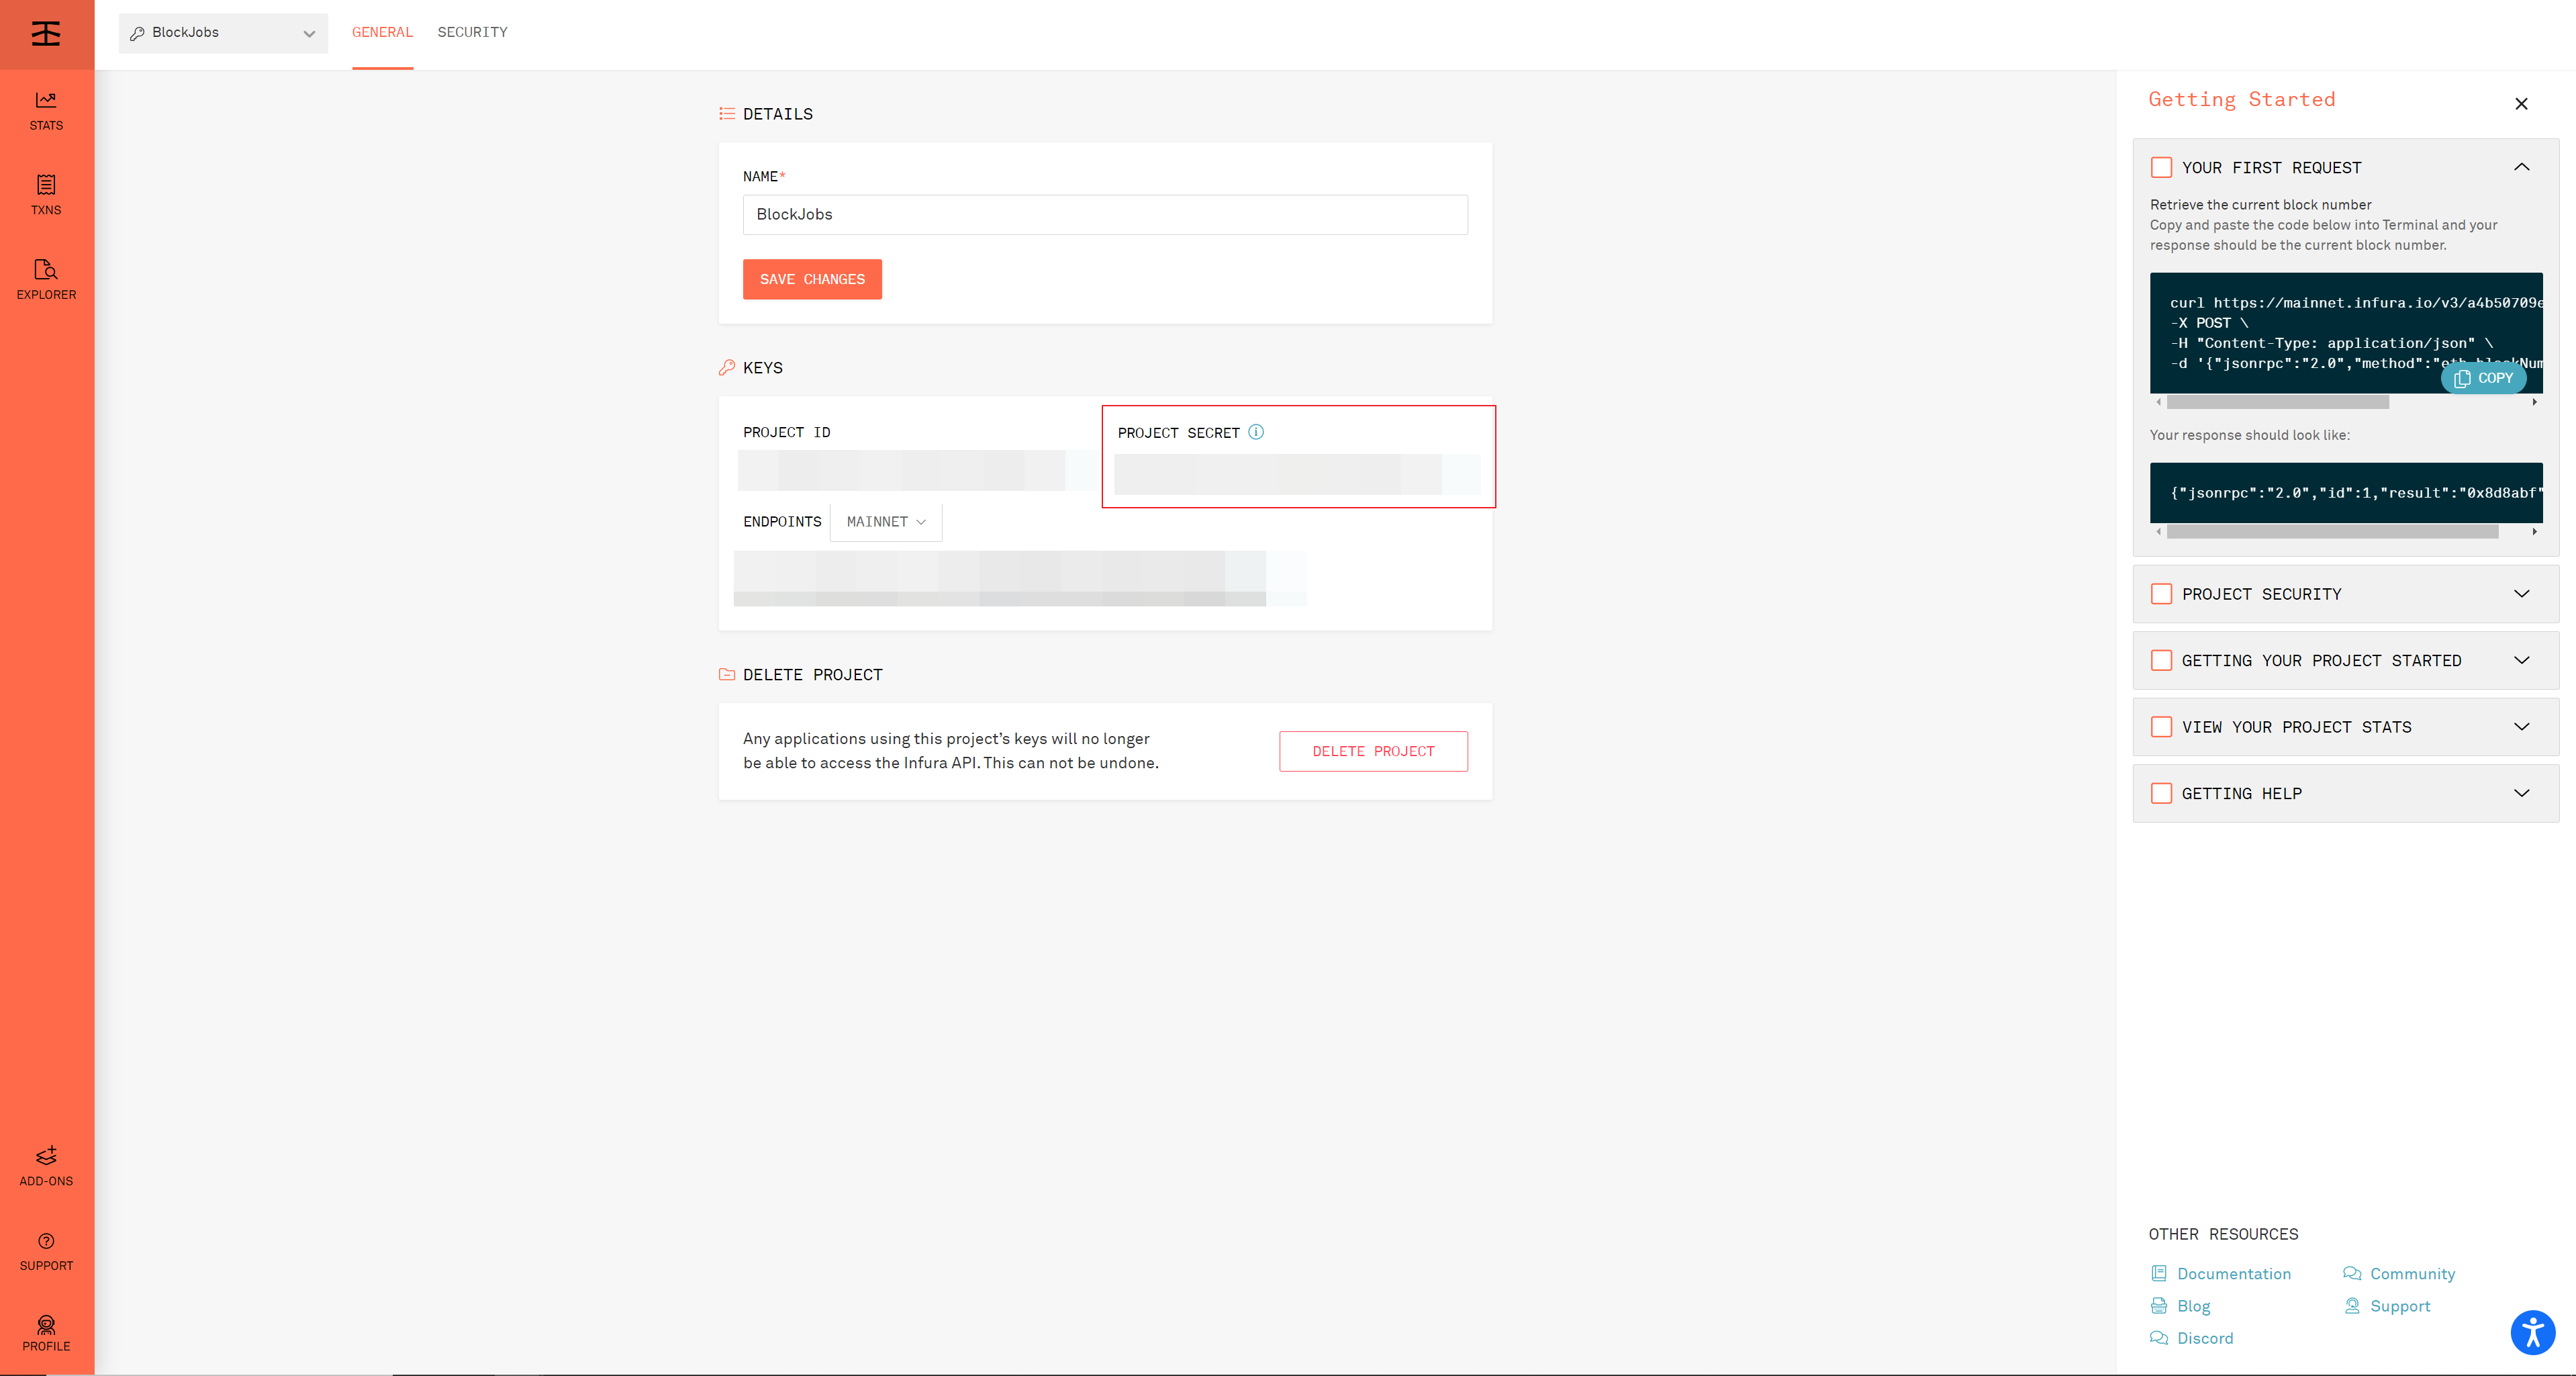
이미 infura를 사용한 적이 있는 사람은 접속하여 InfuraId를 복사 붙여넣기 하면 된다. 새 계정인 경우엔 CREATE NEW PROJECT 탭으로 이동해 프로젝트를 생성하고 해당 프로젝트의 세팅 화면에서 자신이 사용할 네트워크의 infuraId를 가져오면 된다. 아래 사진의 빨간 표시 부분이다. 
그리고 아래 소스와 같이 option을 세팅하고 web3Modal을 초기화 해준다.
나같은 경우엔 Ropsten 네트워크를 사용하기 위해 설정했고, 경우에 따라 network를 변경해주면된다.
1
2
3
4
5
6
7
8
9
10
11
12
13
14
15
16
17
const providerOptions = {
  walletconnect: {
    package: WalletConnectProvider,
    options: {
      infuraId: process.env.INFURA_PUBLIC_ID,
    },
  },
};

let web3Modal: Web3Modal | null;
if (typeof window !== "undefined") {
  web3Modal = new Web3Modal({
    network: "Ropsten",
    cacheProvider: true,
    providerOptions,
  });
}
state
먼저, 아까 맨 처음에 구성한 recoil atom을 먼저 세팅해주었다. modalprovider와 web3Provider을 recoil로 관리하지 않은 이유는 아래 소스의 반환 값들이 readonly라 state로 정의가 불가능하다고 오류가 떴다;; 정확한 이유는 모르겠다 ㅠㅠ 개발 중에 수정이 가능하면 수정할 생각이다.
1
2
3
4
5
const [web3State, SetWeb3] = useRecoilState<Web3_Model>(initialWeb3);
// eslint-disable-next-line @typescript-eslint/no-explicit-any
const [modalProvider, SetModalProvider] = useState<any>(null);
const [web3Provider, SetWeb3Provider] =
  useState<ethers.providers.Web3Provider | null>(null);
web3 connect
web3을 연결하는 부분은 아래 소스와 같다. web3modal로 먼저 지갑 계정을 연결한 뒤 반환 받은 provider을 ethers.js provider에 주입하는 방식이다.
나는 connect를 하면서 바로 연결된 계정을 통해 contract를 실행시키기 위해 아래와 같이 Contract를 초기화 하여 반환해주었다. toast와같은 component로 지갑의 변경을 표시해주는 것도 좋은 방법이다.
1
2
3
4
5
6
7
8
9
10
11
12
13
14
15
16
17
18
19
20
21
22
23
24
25
26
27
const connect = useCallback(async () => {
  if (web3Modal) {
    try {
      const provider = await web3Modal.connect();
      const web3Provider = new ethers.providers.Web3Provider(provider);
      const signer = web3Provider?.getSigner();
      const address = await signer.getAddress();
      const network = await web3Provider?.getNetwork();

      const ConnWeb3: Web3_Model = {
        address: address,
        network: network,
      };

      const Contract = new ethers.Contract(
        Contract_Address,
        BlockJobs_ABI,
        signer
      );

      return Contract;
    } catch (e) {
      console.log("web3 connection error", e);
    }
  } else {
  }
}, []);
web3 disconnect
disconnection는 특별한 것 없이 modalProvider의 disconnect함수를 사용하고 recoil의 atom을 초기화 시켜주었다.
1
2
3
4
5
6
7
8
9
10
11
12
13
14
15
16
const disconnect = useCallback(async () => {
  if (web3Modal) {
    web3Modal.clearCachedProvider();
    if (modalProvider) {
      await modalProvider.disconnect();
    }

    const DisConn: Web3_Model = {
      address: null,
      network: null,
    };
    SetWeb3(DisConn);
  } else {
    console.error("No Web3Modal");
  }
}, []);
web3 changed
modalProvider가 연결되어있을 때 지갑이나 네트워크가 변경되었을 때를 확인하는 changed 이벤트 들을 정의해 두었다.
1
2
3
4
5
6
7
8
9
10
11
12
13
14
15
16
17
18
19
20
21
22
23
24
25
26
27
28
29
30
31
32
33
34
useEffect(() => {
  if (modalProvider?.on) {
    const handleAccountsChanged = (accounts: string[]) => {
      SetWeb3({ ...web3State, address: accounts[0] });
    };

    const handleChainChanged = (_hexChainId: string) => {
      if (typeof window !== "undefined") {
        console.log("switched to chain...", _hexChainId);
        window.location.reload();
      } else {
        console.log("window is undefined");
      }
    };

    const handleDisconnect = (error: { code: number; message: string }) => {
      // eslint-disable-next-line no-console
      console.log("disconnect", error);
      disconnect();
    };

    modalProvider.on("accountsChanged", handleAccountsChanged);
    modalProvider.on("chainChanged", handleChainChanged);
    modalProvider.on("disconnect", handleDisconnect);

    return () => {
      if (modalProvider.removeListener) {
        modalProvider.removeListener("accountsChanged", handleAccountsChanged);
        modalProvider.removeListener("chainChanged", handleChainChanged);
        modalProvider.removeListener("disconnect", handleDisconnect);
      }
    };
  }
}, [web3Provider, disconnect]);
useWeb3Client
이제 위에 정의한 모든 소스를 아래처럼 주입하여 훅으로 사용할 수 있다!
1
2
3
4
5
6
7
8
const useWeb3Client = () => {
  //위에 정의한 소스

  return {
    connect,
    disconnect,
  };
};